


Leaking kitchen tap: fix it fast in Belgium

Updated: Sep 3
A leaking kitchen tap is caused primarily by worn washers, cartridges, or loose fittings, and most minor leaks can be repaired in under 30 minutes with basic tools. A dripping tap wastes approximately 14 litres of water every single day. That adds up quickly on your water bill and causes unnecessary environmental harm. This guide walks you through the tools you need, a clear step-by-step repair process, and honest advice on when to call a trusted English-speaking plumber in Brussels, Waterloo, Tervuren, or Leuven.
What tools and parts do you need for kitchen tap repair?
Gathering everything before you start saves time and prevents frustration. A kitchen tap repair, known in the trade as faucet maintenance, requires only a small set of tools that most households already own.
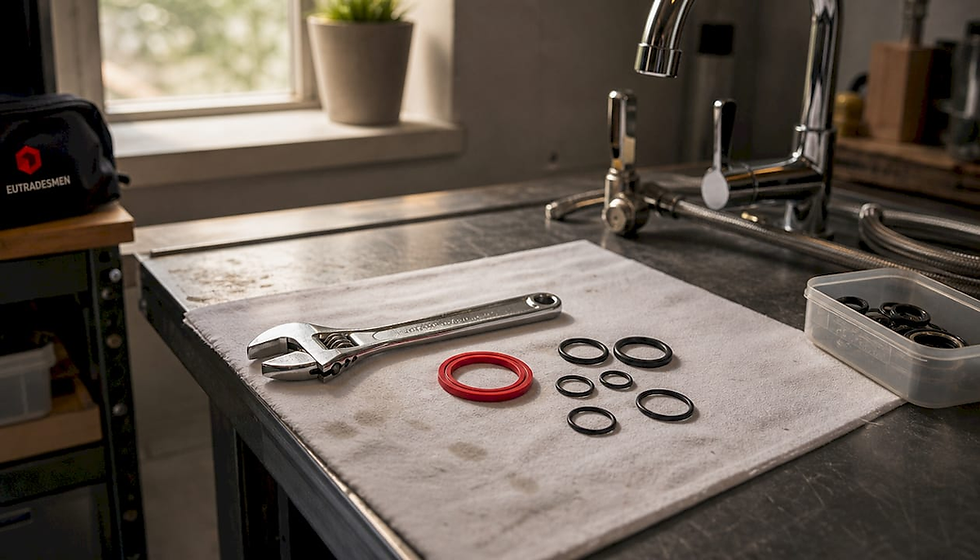
Tool or Part | Typical Use | Approximate Cost |
Adjustable spanner | Loosening and tightening tap nuts | Already owned |
Screwdrivers (flat and cross) | Removing handle screws | Already owned |
Waterpump pliers | Gripping awkward fittings | Already owned |
Allen keys (hex keys) | Removing grub screws on modern taps | Already owned |
Rubber washers | Replacing worn seals in traditional taps | €1–€3 |
O-rings | Sealing cartridge housings | €1–€3 |
Replacement cartridge | Fixing mixer or thermostatic taps | €5–€15 |
Around 80% of minor tap leaks are fixable by homeowners in under 30 minutes, with parts costing between €5 and €15. That means most repairs cost less than a single takeaway meal.
Prepare your workspace before touching the tap. Place a folded towel or a small bucket in the sink basin. Workspace preparation prevents small screws and washers from disappearing down the drain, which is one of the most common and avoidable delays during a repair.
Pro Tip: Take a photo of the tap before you disassemble anything. A quick snapshot on your phone costs nothing and saves real confusion when you are putting it all back together.
How do you repair a leaking kitchen tap step by step?
Most kitchen tap leaks fall into three categories: a worn washer, a faulty cartridge, or a loose connection. The repair process follows the same logical sequence for all three.

Step 1: Turn off the water supply
Locate the isolation valves under the sink. Turn them clockwise until they stop. If there are no isolation valves, turn off the mains stopcock. Open the tap fully to release any remaining water pressure in the pipe.
Step 2: Remove the tap handle
Prise off the decorative cap on top of the handle (usually a small plastic disc).
Unscrew the handle screw underneath using a screwdriver or Allen key.
Lift the handle straight up and set it aside.
Use your adjustable spanner to unscrew the packing nut or cartridge retaining nut.
Pull out the cartridge or unscrew the washer holder at the base of the spindle.
Step 3: Replace the worn part
Inspect the rubber washer at the bottom of the spindle. If it looks flattened, cracked, or misshapen, replace it with a new one of the same size. For mixer taps, pull out the cartridge and take it to a hardware shop to match the replacement exactly. Replacing worn cartridges or washers stops most leaks; damaged valve seats are the exception and require professional attention.
Step 4: Check and replace O-rings
O-rings sit around the cartridge body or spindle and seal the tap against the body. A leak around the base of the spout usually points to a failed O-ring rather than a washer. Replace any O-ring that looks swollen, cracked, or misshapen.
Step 5: Reassemble and test
Reverse the disassembly steps. Tighten the packing nut firmly but do not overtighten, as this can crack the fitting. Turn the water supply back on slowly. Check for drips at the spout and around the base of the tap.
Pro Tip: Taking photos during disassembly is the single most effective way to remember the correct assembly order, especially for single-lever mixer taps with multiple small components.
Safety precautions and common mistakes to avoid:
Never skip turning off the water supply before starting.
Do not force a stuck handle. Apply a little penetrating oil and wait five minutes.
Avoid overtightening nuts, which can crack plastic fittings or damage threads.
Match replacement parts by size and material before purchasing.
Do not ignore a leak at the base of the tap. It signals an O-ring failure, not just a worn washer.
When should you call a professional plumber?
Some kitchen plumbing issues go beyond a simple washer swap. Knowing when to stop and call a professional saves you time, money, and potential water damage.
Signs that a DIY fix is not enough:
The leak persists after replacing the washer and cartridge.
You notice water stains or soft wood inside the cabinet under the sink.
The tap body feels loose or the valve seat looks pitted or corroded.
You have a thermostatic or pressure-balancing tap with electronic components.
Water is dripping from the supply pipes themselves, not the tap.
Leaks at the base or under the sink can cause serious hidden water damage to cabinets, flooring, and walls, often costing far more to repair than the original tap fix would have. Act quickly if you spot any moisture inside the under-sink cabinet.
A pitted or scaled valve seat inside the tap causes ongoing drips even after you fit brand-new parts. Continuing to replace washers without inspecting the seat is wasted effort. At that point, tap replacement is the practical solution.
Professional plumbers in Belgium charge €60–€90 per hour plus a call-out fee of €30–€50. A straightforward tap repair typically costs €80–€150 in total. For expats and renters in Brussels, Waterloo, Tervuren, and Leuven, finding an English-speaking plumber removes the stress of explaining the problem in French or Dutch. Always ask for a written quote before work begins.
Troubleshooting tips after fixing a dripping faucet
A successful repair does not always mean the problem is gone for good. A few simple checks after reassembly protect your work and prevent repeat call-outs.
Check the valve seat. Run your finger around the inside of the tap body where the washer presses. A rough or pitted surface causes new washers to fail quickly.
Descale with vinegar. Soaking parts in vinegar removes limescale that causes leaks to persist even after part replacement. Leave metal components in white vinegar for 30 minutes, then rinse thoroughly.
Watch for slow drips. A tap that drips only when fully closed, or only under high pressure, points to a valve seat problem rather than a washer issue.
Schedule annual checks. Inspect washers and O-rings once a year. Belgian tap water in cities like Brussels and Leuven can be hard, which accelerates limescale build-up and part wear.
Keep your repair photos. Store the photos you took during disassembly on your phone. They are invaluable if the same tap needs attention again in 12 months.
Pro Tip: If limescale is a recurring problem in your area, fit an inline water filter or softener to the cold supply under the sink. It extends the life of washers and cartridges significantly.
Key takeaways
A leaking kitchen tap is almost always caused by a worn washer, faulty cartridge, or failed O-ring, and most repairs cost under €15 and take less than 30 minutes.
Point | Details |
Most leaks are DIY-fixable | Around 80% of minor tap leaks can be repaired at home with basic tools and parts costing €5–€15. |
Prepare your workspace first | Place a towel or bucket in the sink to catch small parts before you start disassembly. |
Photograph every step | Photos taken during disassembly make reassembly straightforward, especially for mixer taps. |
Valve seat damage needs a pro | Persistent drips after new parts signal a damaged seat; tap replacement is then the practical fix. |
Hidden leaks cause serious damage | Water under the sink can ruin cabinets and flooring; act immediately if you spot moisture. |
What I have learned from years of kitchen tap repairs in Belgium
Working with homeowners and renters across Brussels, Waterloo, Tervuren, and Leuven, I have seen the same pattern repeat itself. People wait too long. A small drip becomes a stained cabinet, a warped floor panel, or a mould problem behind the kickboard. The repair that would have cost €10 in parts and 20 minutes of effort turns into a €300 call-out.
The good news is that most leaks are genuinely straightforward. A worn washer or a tired cartridge accounts for the vast majority of cases. If you follow the steps above and take your time, you will fix it yourself. The key is acting the moment you notice the drip, not next weekend.
Where I see people go wrong is skipping the valve seat inspection. They fit a new washer, feel pleased with themselves, and then find the tap dripping again three weeks later. Always check the seat. If it feels rough under your fingertip, no washer will hold.
For expats and renters who are not comfortable with plumbing, or who face a more complex thermostatic tap, calling a trusted English-speaking plumber is the right call. The language barrier in Belgium is real, and explaining a plumbing fault in French or Dutch when you are stressed is nobody’s idea of a good afternoon. Use a service that speaks your language and gives you a clear price upfront.
— Eutradesmen
Reliable plumbing help in Brussels, Waterloo, Tervuren, and Leuven
Eutradesmen has provided trusted English-speaking plumbing and handyman services across Belgium for over 20 years. Whether you need a quick tap washer replaced or a full under-sink inspection, the team covers Brussels (including Ixelles, Uccle, and Schaerbeek), Waterloo, Tervuren, and Leuven with transparent pricing and clear communication in English.
No language stress. No surprise bills. Just reliable tradespeople who show up, fix the problem, and explain what they did. You can also browse the full range of plumbing and repair advice on the Eutradesmen blog for more practical guides tailored to Belgian homes.
Ready to solve your issue? WhatsApp +32 466 900 281 for a free quote today!
FAQ
How much does it cost to fix a leaking kitchen tap in Belgium?
A DIY repair costs €5–€15 in parts. Hiring a professional plumber in Belgium typically costs €80–€150 for a straightforward tap repair, including a call-out fee of €30–€50.
What causes a kitchen tap to keep dripping after I replace the washer?
A persistent drip after fitting a new washer usually means the valve seat inside the tap is pitted or scaled. Replacing the washer again will not solve it; the seat needs resurfacing or the tap needs replacing.
Can I fix a leaking kitchen tap without turning off the mains?
Most taps have isolation valves under the sink that you can turn off without touching the mains stopcock. If no isolation valves are fitted, you must turn off the mains supply before starting any repair.
How do I stop limescale causing repeat leaks in my tap?
Soak metal tap parts in white vinegar for 30 minutes to dissolve limescale before reassembly. Fitting an inline water filter or softener under the sink reduces long-term build-up in hard-water areas like Brussels and Leuven.
When should I replace the whole tap rather than repair it?
Replace the tap when the valve seat is severely damaged, when the tap body is cracked, or when repair parts are no longer available for an older model. A plumber can advise you on the most cost-effective option.
Contact Eutradesmen
WhatsApp: +32 466 900 281 Telephone: +32 2 808 70 31 Email: info@eutradesmen.com
Follow us everywhere
Instagram → https://www.instagram.com/eutrsdesmen/ Facebook → https://www.facebook.com/eutradesmen/ Threads → https://www.threads.com/@eutrsdesmen Bluesky → https://bsky.app/profile/eutradesmen.bsky.social TikTok → https://www.tiktok.com/@eutradesmenbelgium Pinterest → https://www.pinterest.com/eutradesmen/ Google Maps → https://maps.app.goo.gl/zjmYyCV1uADPj7QP6 YouTube → https://www.youtube.com/@Eutradesmen LinkedIn → https://www.linkedin.com/in/eutradesmen-belgium X Twitter → https://x.com/eutradesmen
#LeakingKitchenTap #KitchenTapRepair #PlumberBrussels #PlumberWaterloo #PlumberTervuren #PlumberLeuven #EnglishPlumberBelgium #HandymanBrussels #ExpatsInBelgium #BelgiumHomeRepair #FixingKitchenFaucet #DIYPlumbing #EutrademenBelgium #BrusselsExpats #WaterlooExpats #TervurenExpats #LeuvenExpats #HomeRepairBelgium #PlumbingBelgium #EnglishSpeakingTradesmen
Recommended


Comments